Overview
For context on why your website can now accept AI instructions, start with the overview of the series.
In-Article Navigation
- What You’ll Need
- Step 1: Get Your OpenAI API Key
- Step 2: Add the ChatGPT or Codex Configuration
- Step 3: Connect to Your VR MCP Server
- Step 4: Authenticate Your Connection
- Step 5: Test Your Connection
- Switching Between Assistants
[ywost_series_toc current=”connect-chatgpt-codex”]
You Don’t Have to Pick Just One
Maria manages listings for a team of 12 agents. She connected Claude to her website last month using the Claude connection guide. Claude works great for listing descriptions and blog posts. But for one specific task—generating code snippets for custom listing pages—she wants to try Codex, OpenAI’s coding assistant. Here’s the good news: she doesn’t need to start from scratch. The same MCP server (Model Context Protocol — think of it as your website’s AI connection) that connects Claude also connects ChatGPT and Codex. You just swap out which assistant you’re talking to.
This guide walks you through adding ChatGPT or Codex to your website using the same setup you already have. If you haven’t connected Claude yet, read that guide first — everything here builds on it.
What You’ll Need
Before you start, gather these three things:
- An OpenAI account with API access. Our understanding is that this is different from a regular ChatGPT Plus subscription — you’ll likely need to set up separate paid API access on platform.openai.com, but confirm the current account/billing setup on OpenAI’s site before you budget for it.
- An API key from OpenAI (we’ll get this in Step 1).
- Your website’s MCP connection already set up (from the Claude guide). If you haven’t done this yet, finish that first.
You don’t need any new software or tools. Everything happens in the same place as your Claude connection.
Step 1: Get Your OpenAI API Key
OpenAI keeps API keys in your account settings, separate from the web app. Here’s roughly how to find yours (OpenAI’s own interface is the source of truth if anything below looks different):
- Log in to your OpenAI account at platform.openai.com.
- Look for something like API keys in the left sidebar.
- Look for a button along the lines of Create new secret key.
- Give it a descriptive name like “My Real Estate Website” so you remember what it’s for later.
- Copy the key to a safe place (typically you can’t view it again after you close the screen).
Keep this key private. Anyone with this key can use your OpenAI account (and your billing). Treat it like a password.
Step 2: Add the ChatGPT or Codex Configuration
Your website’s connection tool (the same one you used for Claude) should have a place to add a new assistant. Head to your MCP server settings.
Note: the exact labels in this step — “Add Assistant,” the assistant-type dropdown, the permission checkboxes — are our best understanding of the flow and haven’t been verified against the live tool. Use them as a guide to the general shape of the setup, and confirm the real wording before you publish or rely on this article.
- Open your MCP connection tool in the same place where you set up Claude.
- Look for something like Add Assistant or New Connection.
- Select OpenAI as the provider.
- For the assistant type, you’ll likely be choosing between something like:
– ChatGPT — general-purpose writing and reasoning. (The specific model behind this — GPT-4, GPT-3.5, or a newer release — depends on what OpenAI currently offers; check OpenAI’s site for the current lineup rather than relying on any model name mentioned here.)
– Codex — geared toward writing and debugging code. Exact naming and capabilities may differ from what’s described here.
- Paste your API key into the field for it.
- Leave the other settings at their defaults unless you know you need to change them.
Step 3: Connect to Your VR MCP Server
Now you’re telling the VR MCP server that this new OpenAI assistant should be able to access your website, just like Claude can.
- In your connection tool, look for something like a Permissions section.
- Under the ChatGPT or Codex connection you just created, look for checkboxes along the lines of:
– Read listings
– Create/edit blog posts
– Create/edit listings
(You can give it different permissions than Claude if you want — maybe Codex only gets access to code-related tasks, for example.)
- Look for a button like Save Configuration.
Your website’s MCP server now knows about this new assistant and what it’s allowed to do.
Step 4: Authenticate Your Connection
The last step connects your OpenAI account to your website’s authentication setup:
- In your connection tool, look for something like Test Connection next to your ChatGPT or Codex entry.
- The system will try to reach OpenAI’s servers and confirm your API key works.
- If it succeeds, you should see a green checkmark. If it fails, double-check that you copied your API key correctly (no extra spaces).
- Once the test passes, look for a button like Activate to turn on this assistant for your website.
Step 5: Test Your Connection
Try asking your website something using ChatGPT or Codex. Pick a simple task first — don’t jump into something complex.
Example: If you set up Codex, try: “Generate a simple code snippet to display the price of a listing.”
Or if you set up ChatGPT, try: “Write a three-sentence description for a new listing.”
After a few seconds, your assistant should:
- Read from your website
- Understand what you’re asking
- Complete the task using your website’s data
- Return the result
If the connection works, you’ll see the result in your chat interface. If something went wrong, check that:
- Your API key is correct and hasn’t expired
- The permissions you set in Step 3 allow the task you’re trying
- Your website’s MCP server is still running
If you’re stuck, walk through the same steps you took for Claude in the Claude guide — the troubleshooting is identical.
Switching Between Assistants
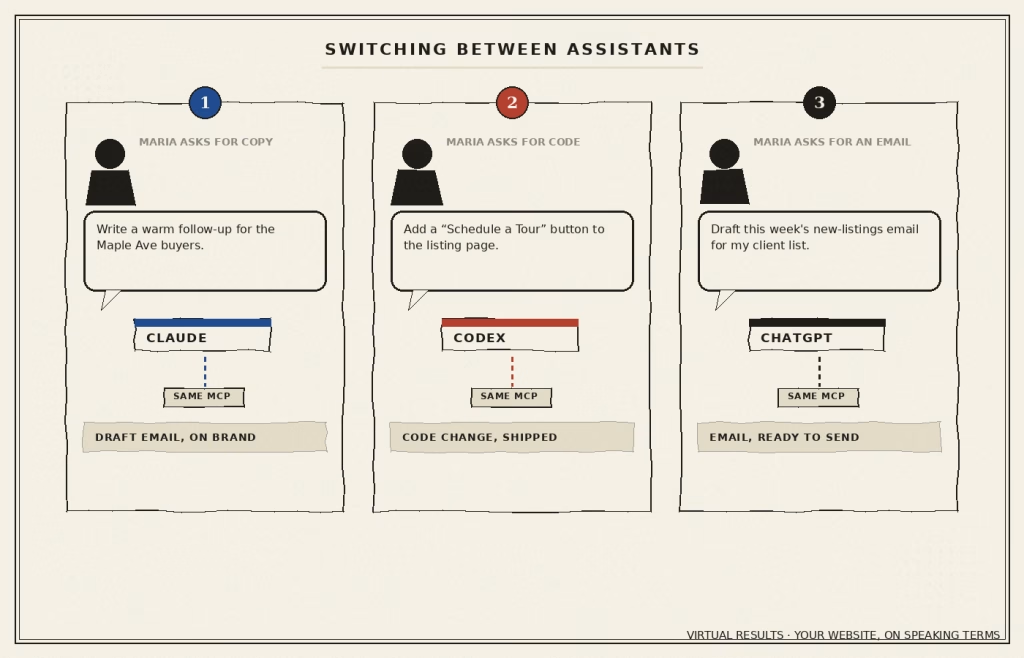
Here’s what’s powerful: once you’ve set up both Claude and ChatGPT (or Codex), you can choose which one to use for each task without any reconfiguration.
Maybe you ask Claude to write a blog post because you like its voice. Then you ask Codex to write the code snippet to display it. Then ChatGPT helps you craft an email to your team about the new listing. Same website, same connection, different assistants for different jobs.
If you connect multiple assistants, your team members can pick their favorite in their settings, or you can route specific tasks to specific assistants automatically.
What’s Next
You’ve now got multiple AI assistants connected to your website through the same MCP server. Your next step depends on your workflow:
- Working from the command line? Jump to CLI connections for power-user setup.
- Want to connect your whole team? Read about getting your team connected.
- Need to lock down permissions? Check out authentication and security.
Curious how this works in practice? See a demo of ChatGPT and Codex working together on your website — writing copy, generating code, and handling team tasks through the same MCP connection.